Recycled Bath Mat
http://www.ecologue.com/ShowArticle/recycled-bathroom-mat
[ This article is from: Michelle Kaufmann's Eco Ideas , Crafty Recycling , Going Green in the Bath ]
Michelle Kaufmann
Salvage older towels and t-shirts by turning them into a lush, cozy bathmat.
Tie each strip of towel onto the gridded mat.
By Michelle Kaufmann
Millions of tons of textile waste end up in landfills every year despite all the great ways there are to recycle it. The best way to get rid of your old clothing, linens, and rugs is to find a local charitable organization and donate them. But for those ancient towels that have seen a few too many days at the beach or now look more like cheesecloth, charitable donation may not be an option.
Instead, give those old towels a second life by turning them into a super soft, oh-so-cozy bath rug. All you need besides the towels (old t-shirts will also work but with less luxurious results) is a gridded matting that you can find at any craft store.
VIDEO: Watch Michelle transform cloth scraps into this cozy bath rug >>
To make your own:
1. First, make sure your towel or towels are all well washed.
2. Decide how big you want your bath rug to be and then cut your gridded matting to those dimensions.
3. Turn your scissors on your towels and begin cutting them into 5 or 6 inch long pieces about 3/4 of an inch thick.
4. Now it’s just a matter of knotting each strip along the grid, making sure they all face the same way. For the best results we recommend knotting along every line, but if you don’t mind a thinner mat – or just don’t have the patience – then every other line is fine, too.
You can work on this project while you’re watching TV or sitting around with your family after dinner – whenever your hands are free. It may take you a while but it will be worth it once you’re finished.
Download a pdf of these instructions from Michelle Kaufmann's blog >>
Get other simple, stylish green-it-yourself ideas from Michelle Kaufmann >>
Thursday, January 29, 2009
Wall Calendar

I'm trying to find different ways to create a huge calendar to put on my wall, this one is nice i need to go bigger
Sunday, January 25, 2009


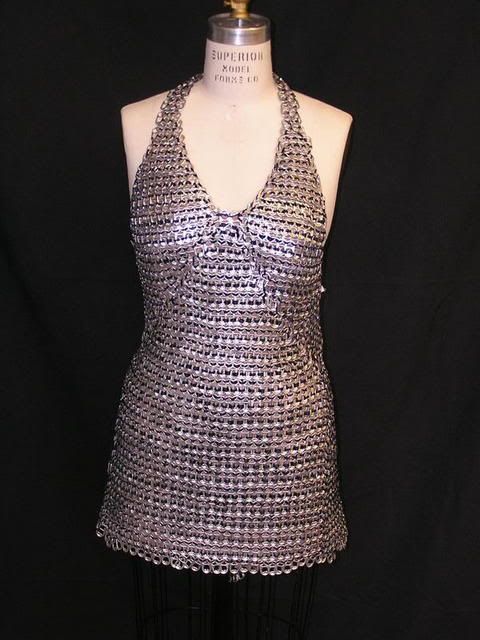
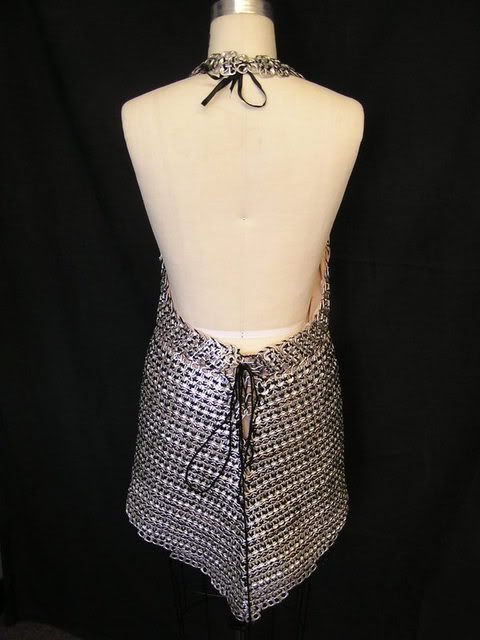
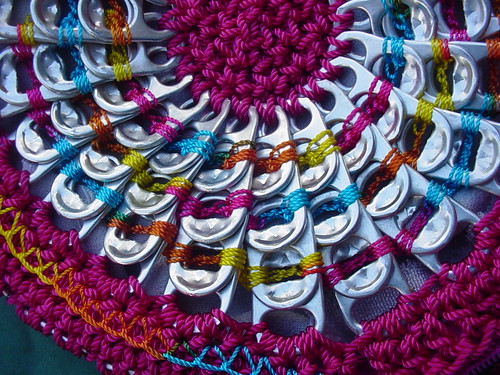
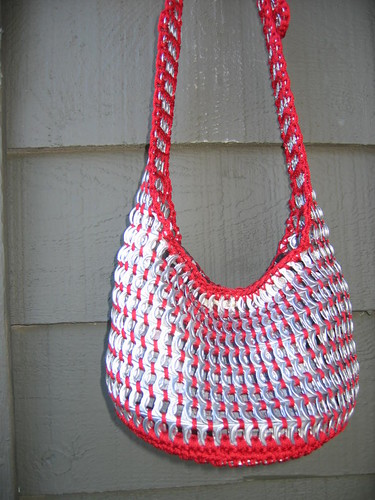
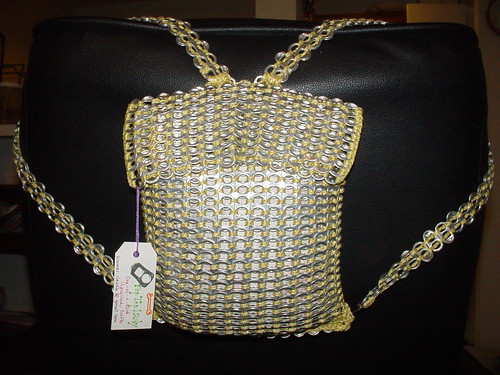
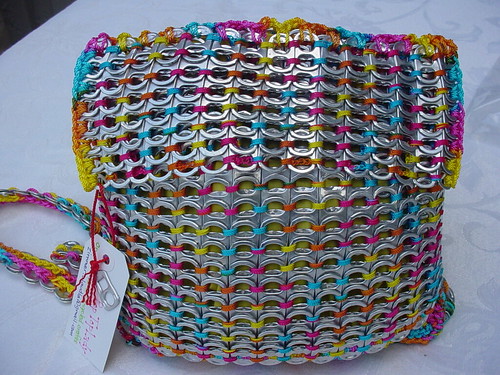
Soda Tab Fashion
I was thinking about making a couple things with soda tabs, so I began surfing the web and came across some really cool shit.


Friday, January 23, 2009


Clone A Fitting Assistant. Threads Magazine
Clone Yourself A Fitting Assistant
Duct-Tape Dress Form


Joyce Perhac, a teacher and sewing-show organizer from Monroeville, Pennsylvania, has perfected a quick method of form making that uses ordinary duct tape as both the body-casting material and the final form. She's written a booklet describing the entire process ("Make Your Own Body Form," available for $10 from her at www.sewingevents.com), but we'll cover the highlights here. (Pure Whimsy no longer carries the booklet.)
Start with your "victim" wearing well-fitted undergarments of her usual type under a long T-shirt, which needn't be too tight. Begin by wrapping the tape horizontally at the bottom, mid-thigh, ideally with a tape-cutting helper (use old scissors, as the tape gets gummy; a size-10 figure requires 1 to 1-1/2 60-yd. rolls of tape). Wrap snugly, but not so tight as to rearrange or compress the body. At the waist, wrap a little more loosely on the first layer, allowing folds to form as you follow the contour, if necessary.
|  | |
| Three layers of duct tape make the form. Wrapping horizontally, start at the thighs and work up. | Wrap snugly around the thighs and hips, a little looser at the waist. |
At the bust and underarm, cut the T-shirt sleeves if needed to allow the tape to follow the figure, and use shorter pieces arranged radially over the bust. Protect the neck area with plastic wrap, then wrap to form edges at the neckline and armholes similar to those you'd want on a fitted bodice.
 |  | |
| In the bust area, use shorter tape and change direction. Short pieces of tape capture the contours of the bust better. Arrange them so they radiate out from the center of the bust area. | Protect the neck area with plastic wrap; wrap to form edges at the neckline and armholes similar to those you'd want on a fitted bodice. |
When the first layer is complete, wrap twice more, first vertically, then again horizontally, further compressing the waistline to fit each layer more closely, and smoothing over wrinkles this causes with more tape.
When finished, have the "wrappee" bend slightly to reveal her waistline, and mark it (and any other points you want identified) with marker or later with colored tape.
 |  | |
| Mark the waist. Bending slightly will reveal your wrappee's natural waist. Mark all around with a permanent marker. | Cut carefully up the back. Keep your hand between the tee shirt and the wrappee's body to avoid cutting undergarments or flesh. |
Cut off the form and T-shirt layer at center back with your other hand between scissors and body to avoid cutting undergarments (or the wrappee!). Then close the form with additional tape, stuff it with poly batting, and place it on a stand (read on for stand ideas). Joyce's finished form has a polished look, similar to an industrial dress form.
Duct-Tape Dress Form #2


Leah Crain, a dressmaker and costumer from Cincinnati, OH, has another take on the duct-tape version of form making. You can find her complete directions, including stand ideas, photos, plus comments and questions from other sewers, on the Internet (www.leanna.com). Leah's forms look remarkably like their prior "inmates."
 | |
| Leah Crain's duct-tape forms are close matches of the originals. Like duct-tape dress form #1, this one uses three layers of tape. |
A strong wooden hanger placed inside before stuffing is the start of either a hanging form or a simple stand. For a stand, use a piece of PVC piping or a cardboard tube long enough that you can cut it to your height when the form is ready to set onto its base (you can use a Christmas-tree stand on the outside of the tube, or a microphone stand inside the tube). Tape the hanger to the tube and put it inside the form before stuffing it, then start stuffing by supporting each breast with a glued-in foam raglan shoulder pad if the bust contour needs the additional support (larger bust shapes may tend to cave in over time). Tape the opening at center back closed as you complete the stuffing, then use the hip markings to help arrange the form on the tube to match the wrapper's posture.
|  |  | |||
| Start under the bust. Wrap the midriff snugly, then do a cross-your-heart taping to define the bust area. | |||||
Cut a cardboard base using dimensions from the wrappee, and cut a hole in it so it can slip up the tube, then tape it in place. Stuff and tape over the ends of the sleeves and neck where you want them to end, then compare measurements from wrappee to form. You can adjust the form by cutting slits to form darts, squeezing the form to the new dimension, and retaping.
 A sturdy wooden hanger set into the top of a PVC or cardboard tube gives support to the shoulders.  Stuff the finished form with polyester batting. A sturdy wooden hanger set into the top of a PVC or cardboard tube gives support to the shoulders. |  Finish with a cardboard base. Cut the base to the same dimensions as the wrappee, and tape it in place. |
Molded Papier-Mâché Form


The best thing about the poured-foam form that you make from a surgical-plaster cast or mold is that the mold makes a very accurate copy of your body contours, complete with distinct collarbones and shoulder blades. It's more accurate in this regard than the other methods (duct-tape dress form #1, duct-tape dress form #2, paper-tape dress form). Plaster is also better at molding to and preserving concavities, so this is a good approach if your body has distinct hollows that tape might simply fill over. But the downside of the poured-foam process is the foam itself, which is expensive, somewhat toxic, and hard to find.
Gail Gosser, an artist and art teacher from Schwenksville, Pennsylvania, likes the accuracy of the plaster mold (you can get the plaster and directions for making the mold from My Twin Dressforms). Her method solves the foam problem by replacing it with ordinary papier-mâché. Use paper-pulp insulation mixed with wallpaper paste (both from a building-supply store) to make the mâché, and cut the plaster mold from the body along the sides instead of in front and back as is usual when pouring in foam.
1. Use paper-pulp insulation mixed with wallpaper paste to make the mâché, and cut the plaster mold from the body along the sides, not in front and back.  2. Line each half of the mold with paper towels to keep the papier mâché from sticking to the plaster. |  3. Then build up a 1/2-in. layer of mâché, forming a smooth, wider edge along the mold's edge where the two mâché halves will be glued together. |
 4. When both halves are filled (above), let them dry (helping with fans and hair dryers if the weather is damp). 5. Then smooth the surface texture by spreading more thin mâché over the cracks (right). |  |
 |  | |
| 6. Join the mâché halves with white glue spread thickly along the widened edges, and tie them together firmly, | 7. Slide shims under the cords to tighten them as the glue dries. |
 | ||||||||||||||||||||||
Here's a swiveling stand you can make for any dress form from easily purchased materials.Paper-Tape Dress Form    Barbara Deckert, a dressmaker from Elkridge, Maryland, and author of Sewing for Plus Sizes, uses a form-making method that I've seen in sewing texts from the 1930s: Brown-paper tape from an office-supply store forms a body mold as well as duct tape does, then hardens into "papier-mâché" to become a pinnable form, which you don't even have to stuff.
|


This method is time-consuming (drying time can add days) but very accurate, and it suits Gail's training as a sculptor. One further advantage: you can make neck-and-shoulder-only molds to create anatomically correct coat hangers for finished tailored jackets and works in progress.
Subscribe to:
Posts (Atom)